The Irresistible Appeal of Homemade Walnut Milk: A Healthier, Tastier Alternative
In a world increasingly focused on healthy eating and sustainable living, the quest for wholesome, additive-free ingredients has never been more prevalent. Among the myriad of plant-based milk options available, walnut milk stands out for its rich flavor, creamy texture, and impressive nutritional profile, particularly its abundance of omega-3 fatty acids. While store-bought versions offer convenience, there’s an undeniable superiority to making your own. This article delves into how to make homemade walnut milk and why it consistently triumphs over its commercially produced counterparts in both health benefits and unparalleled taste.
The Unmistakable Advantages of Homemade Walnut Milk
Choosing to craft your own walnut milk isn't just a culinary adventure; it's a commitment to a purer, more wholesome lifestyle. The benefits extend far beyond simply having a plant-based beverage on hand.
Superior Taste and Purity You Can Trust
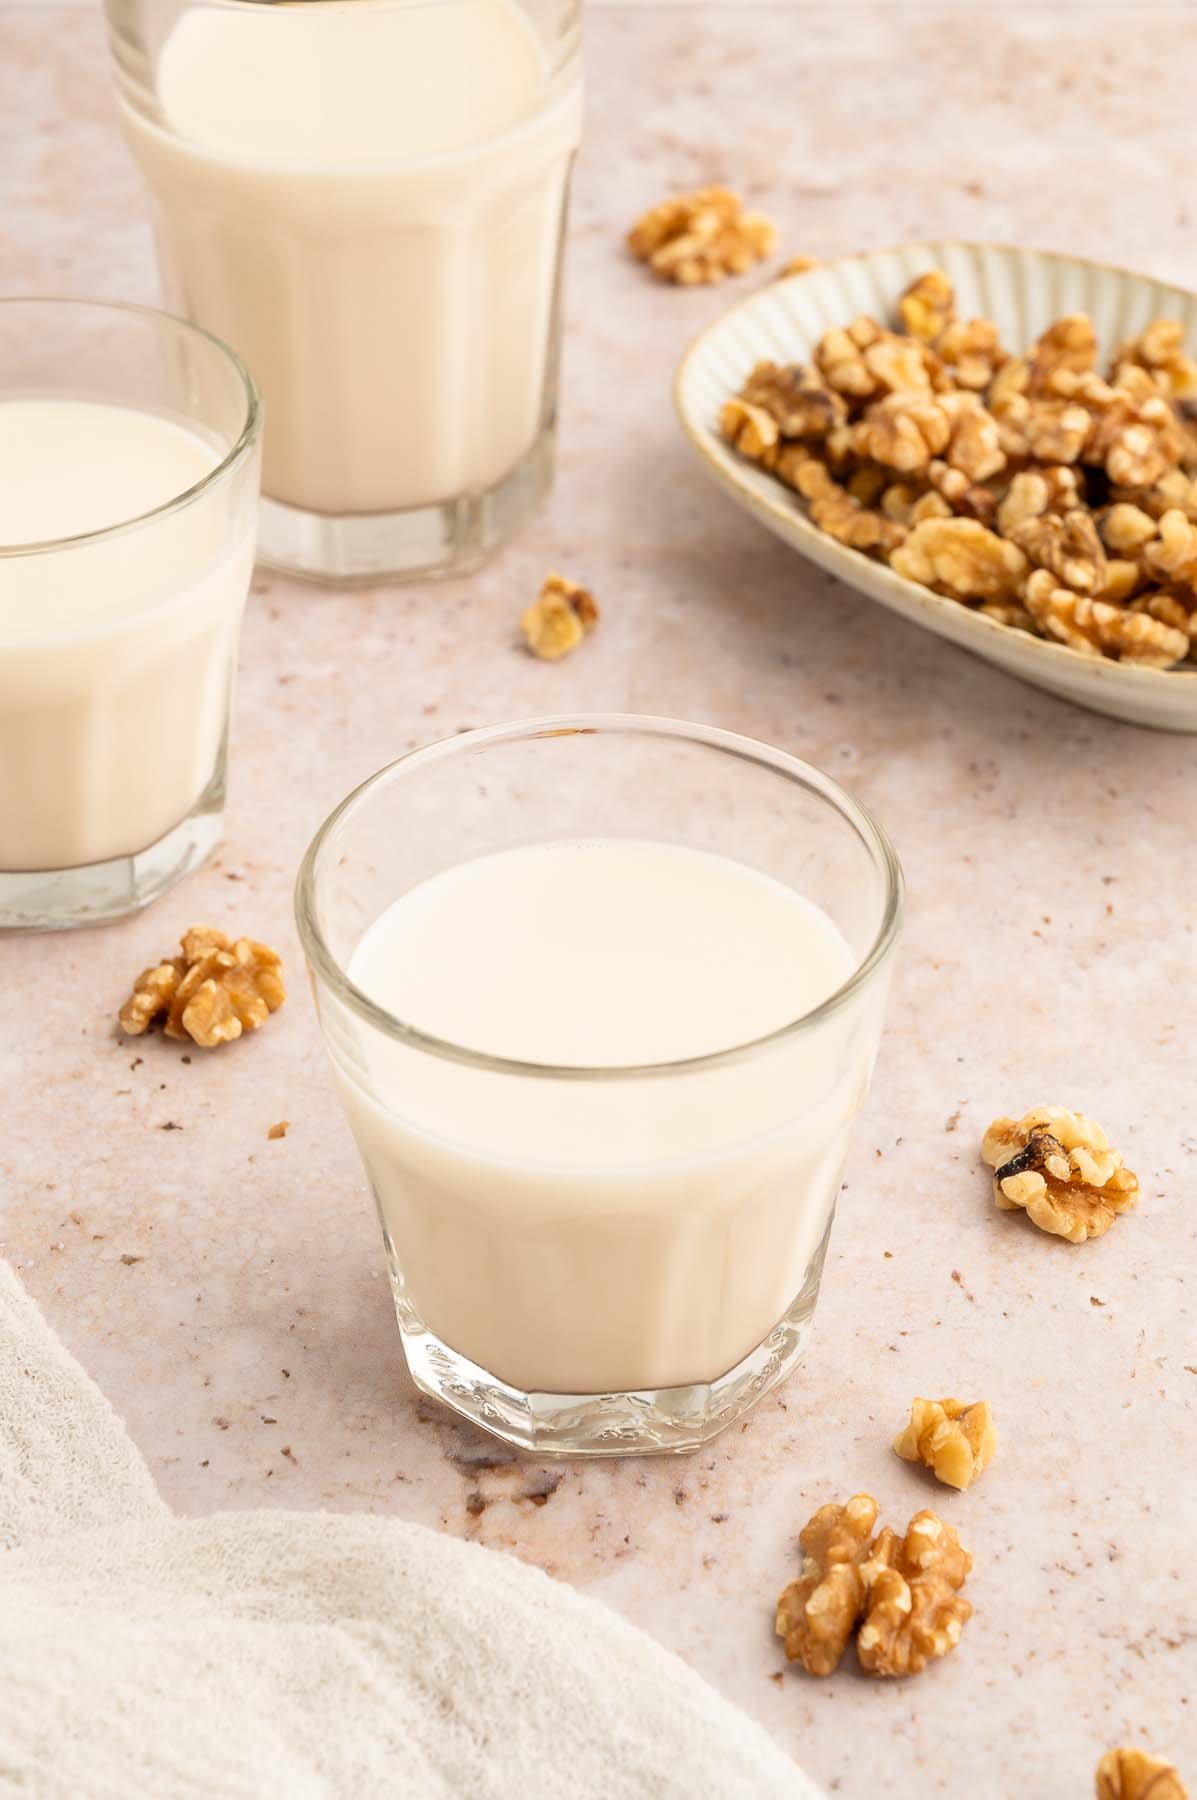
One of the most immediate and compelling reasons to make your own walnut milk is the taste. There's a freshness and depth of flavor in homemade versions that store-bought varieties simply can't replicate. Walnuts themselves possess a distinctive earthy, slightly sweet, and mildly bitter note that, when fresh, translates into an incredibly complex and satisfying milk. Beyond taste, the purity of homemade walnut milk is paramount.
- Freedom from Harmful Additives: Commercial nut milks often contain a cocktail of ingredients designed to extend shelf life, thicken consistency, and prevent separation. These can include gums like carrageenan, guar gum, and xanthan gum. While seemingly innocuous, some studies suggest that carrageenan, for instance, can cause inflammation and digestive issues in sensitive individuals. By making your own, you completely sidestep these unnecessary and potentially harmful additives.
- No Unwanted Sugars: Many store-bought nut milks are laden with added sugars, transforming a healthy beverage into a dessert-like drink. When you make walnut milk at home, you have complete control over the sweetness – or lack thereof. You can enjoy it unsweetened, or add natural sweeteners like dates or maple syrup to your preference.
- Enhanced Nutrient Profile: Walnuts are renowned for their high content of alpha-linolenic acid (ALA), a plant-based omega-3 fatty acid crucial for heart health, brain function, and reducing inflammation. Homemade walnut milk, made with fresh, quality nuts, retains more of these delicate nutrients compared to products that have undergone extensive processing and pasteurization. In fact, walnuts offer more creamy omega-3s than even almonds, making them a powerhouse choice for your daily nutrient intake.
Cost-Effectiveness and a Commitment to Zero Waste
Beyond health and taste, making your own walnut milk is a smart choice for your wallet and the planet.
- Significant Cost Savings: While the initial investment in a bag of quality walnuts might seem higher than a carton of store-bought milk, the cost per serving of homemade nut milk is often considerably lower over time. You're paying for the nuts, water, and a tiny bit of electricity, not for processing, packaging, and marketing.
- Customizable Quantities, Reduced Waste: Have you ever opened a carton of store-bought nut milk only to find it expires before you can finish it? With homemade walnut milk, you can make exactly the quantity you need, whether it's a single cup for your morning coffee or a larger batch for the week. This flexibility minimizes waste of precious nuts and ensures you always have the freshest milk on hand.
- Eco-Friendly Packaging: Say goodbye to single-use cartons! Homemade nut milk can be stored in reusable glass jars or bottles, contributing to a significant reduction in packaging waste. This zero-waste approach is a simple yet impactful way to support environmental sustainability.
- Repurposing Walnut Pulp: The process of making homemade walnut milk leaves you with nutritious walnut pulp. Instead of discarding it, you can transform it into delicious snacks like biscuits, crackers, energy bites, or even incorporate it into baked goods like cobblers or dough. This ensures every part of the walnut is utilized, further reducing food waste.
How to Make Homemade Walnut Milk: A Simple Step-by-Step Guide
Now that you understand the compelling reasons, let's dive into the simple yet rewarding process of how to make homemade walnut milk. It's a method of soak, blend, and strain that yields incredibly satisfying results.
Step 1: Soaking for Optimal Creaminess and Digestion
Soaking walnuts is a crucial first step for several reasons. It softens the nuts, making them easier to blend into a smooth, creamy milk. More importantly, soaking helps to activate enzymes and reduce phytic acid, an anti-nutrient that can inhibit the absorption of minerals. This makes the milk not only more digestible but also allows your body to better absorb the valuable nutrients within the walnuts.
- Measure Walnuts: Start with 1 cup of raw walnuts.
- Cover with Water: Place the walnuts in a bowl and cover them generously with filtered water. Ensure the nuts are fully submerged.
- Soak Time: Let them soak for 8-12 hours, ideally overnight. This is the "set it and forget it" part – you can sleep, work, or relax while your walnuts prepare themselves.
While this article focuses on the traditional soaking method for maximum creaminess and nutrient availability, we understand that sometimes time is of the essence. For a quicker alternative, explore methods that require no soaking or a nut milk bag in our guide: Make Walnut Milk Fast: No Soaking & No Nut Bag Needed!
Step 2: Blending to Perfection
Once your walnuts are plump and ready, it's time to transform them into a milky liquid.
- Drain and Rinse: Drain the soak water completely. While some people use the soak water for blending, using fresh, warm water generally results in a cleaner, tastier milk. A quick rinse of the nuts can also be beneficial.
- Add to Blender: Transfer the soaked walnuts to a high-speed blender.
- Add Fresh Water: This is where you customize your milk's thickness.
- For a rich, thick, cream-like consistency (perfect for coffee or sauces), use a 1:1 ratio: 1 cup of soaked walnuts to 1 cup of fresh, warm water.
- For a thinner, more skim-milk-like consistency, you can increase the water ratio up to 1:3 or 1:4 (1 cup soaked walnuts to 3-4 cups of water). Experiment to find your perfect preference. Warm water helps create a smoother, more emulsified milk.
- Blend Thoroughly: Blend on high for 45-75 seconds, or until the walnuts are maximally pureed and the mixture looks smooth and creamy. The longer you blend, the creamier and more complete the extraction will be.
Step 3: Straining for Silky Smoothness
This is arguably the most satisfying step, as you witness the transformation from a blended mixture to pure, silky walnut milk.
- Prepare for Straining: Place a nut milk bag over a large bowl or pitcher. A nut milk bag is specifically designed for this purpose, with a fine mesh that allows the liquid to pass through while retaining the pulp.
- Pour and Massage: Carefully pour the blended walnut mixture into the nut milk bag. Cinch the top of the bag to prevent pulp from squeezing out. Now, using your hand, gently but firmly massage and squeeze the bag, forcing the milk through the mesh into the bowl below. Continue until no more liquid can be extracted.
- Optional Flavoring: After straining, you can optionally mix in a pinch of sea salt (it enhances flavor beautifully) and a splash of vanilla extract for a subtle sweetness and aroma. If adding sweeteners like maple syrup or dates, blend them in during Step 2. For more ideas on enhancing your homemade milk, check out: Easy Homemade Walnut Milk: Fresh, Customizable & Additive-Free.
- Store: Transfer your freshly made walnut milk to an airtight container, such as a mason jar, and store it in the refrigerator. It typically stays fresh for 3-5 days.
Beyond the Basics: Customization and Creative Uses
The beauty of homemade walnut milk lies in its versatility. Once you've mastered the basic recipe for how to make homemade walnut milk, you can begin to experiment.
Flavor Customization
Personalize your walnut milk to suit your taste or the specific recipe you're using:
- Sweeteners: Add a tablespoon or two of maple syrup, agave nectar, honey, or a couple of pitted dates to the blender with the walnuts and water.
- Spices: A dash of cinnamon, nutmeg, cardamom, or pumpkin pie spice can elevate the flavor, especially for seasonal drinks.
- Extracts: Beyond vanilla, try a drop of almond extract, peppermint extract, or even orange zest for unique twists.
- Cocoa Powder: Blend in a tablespoon of unsweetened cocoa powder for a delicious chocolate walnut milk.
Creative Uses for Walnut Milk
Homemade walnut milk can be used in almost any application where you'd typically use dairy milk or other plant-based alternatives:
- Coffee & Tea: Its inherent creaminess makes it a fantastic addition to your morning coffee, lattes, or chai tea.
- Smoothies & Shakes: A perfect base for nutritious fruit and vegetable smoothies.
- Cereal & Oatmeal: Pour it over your breakfast cereals, granola, or cook your oatmeal with it for added richness.
- Baking & Cooking: Substitute it cup-for-cup in recipes for pancakes, muffins, sauces, soups, and even creamy curries.
- Desserts: Use it to make homemade ice cream, puddings, or custards.
Utilizing Walnut Pulp
Don't let the leftover pulp go to waste! It's still packed with fiber and nutrients. Store it in an airtight container in the fridge for a few days or freeze it for longer storage.
- Baked Goods: Incorporate it into muffins, breads, crackers, or cookies. It adds moisture, texture, and nutritional value.
- Energy Bites: Mix with dates, oats, seeds, and a little maple syrup, then roll into balls for a quick, healthy snack.
- Compost: If you don't have time to use it, it's excellent for your compost bin!
Conclusion
Making your own walnut milk at home is a simple yet profoundly impactful step towards a healthier, more conscious lifestyle. From its superior, additive-free taste and remarkable health benefits, particularly its rich omega-3 content, to its cost-effectiveness and zero-waste potential, homemade walnut milk is a clear winner over store-bought alternatives. By understanding how to make homemade walnut milk, you unlock a world of fresh flavors and complete control over what goes into your body. So, gather your walnuts, soak them overnight, and prepare to elevate your daily routine with this creamy, nutritious, and incredibly satisfying homemade beverage.
